
One master, three VPS: a multi-server walkthrough
Three servers — call them Frankfurt, Tokyo and Singapore — and one user who should be able to pick any of them. Here is every step, with nothing skipped.
0. Decide which one is the master
The master does the accounting and serves the panel and subscriptions, so pick the server you would rather not replace often — the one with the domain, if you have one. Frankfurt here. Nodes only forward; they can be cheap and disposable.
1. Install on all three
bash <(curl -fsSL https://raw.githubusercontent.com/Maoyangui/m-ui/main/deploy/install.sh)Same command on each. Log in to each panel once and change the default password. Open 2053/tcp on the master for yourself; on the two nodes open 2053/tcp to the master's IP only (the master needs it to reach their agent API) — it does not have to face the internet.
2. Certificates
On Frankfurt: issue a Let's Encrypt certificate for its domain, or self-sign. On Tokyo and Singapore: Certificate → Self-sign is enough — each node serves lines with its own certificate, and the master will talk to them with verification relaxed for self-signed nodes (the "insecure" toggle when you add a server).
3. Turn Tokyo and Singapore into nodes
On each of them: Settings → Run as node. The panel shows a pairing card with two values: its API address (https://<ip>:2053/app/) and a token. Leave that page open or copy both.
4. Pair them on the master
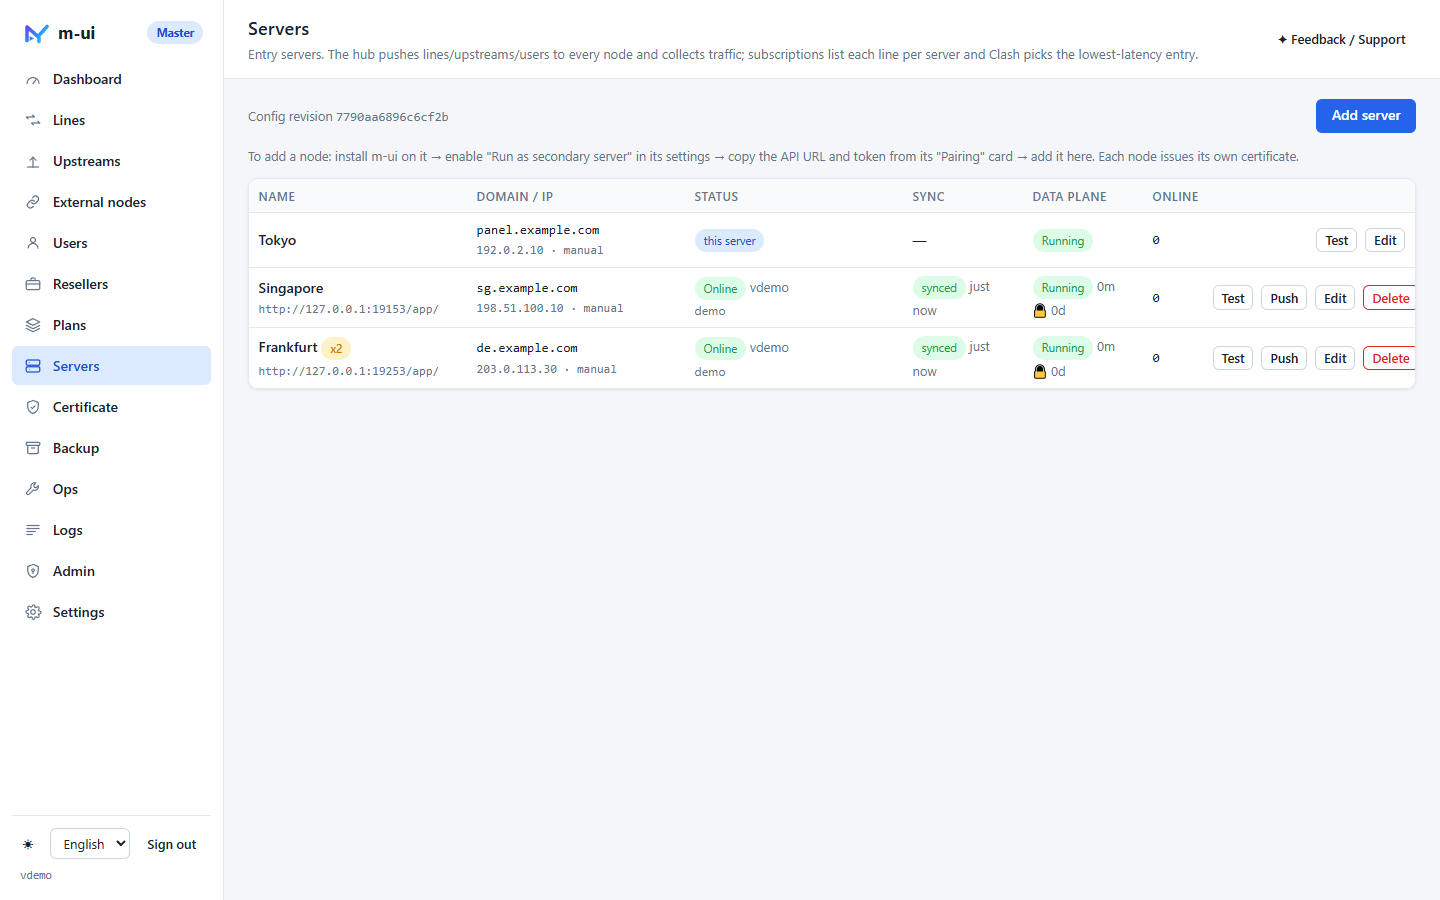
On Frankfurt: Servers → Add server. Name "Tokyo", the domain or IP clients should connect to, the API address and token from step 3, tick "insecure" if the node's certificate is self-signed. Save. Repeat for Singapore. Within five seconds both rows show online · synced. If one shows offline, see the checklist at the end.
5. One line, three servers
Lines → Quick add → Hysteria2 (or AnyTLS, or Reality). Leave "servers" at all, keep the suggested port, tick "assign to all users", save. The master validates the configuration, restarts its own data plane for the new listener, and pushes the line to both nodes on the next snapshot; each node restarts its data plane with its own certificate. Open 24443/udp (or whatever port was suggested) on all three firewalls.
6. A user and their subscription
Users → Add user: a name, a quota, an expiry, a device limit of 3. The detail drawer opens with the subscription link and QR code. Import it into Clash Meta or sing-box: the proxy list shows Hysteria2 – Frankfurt, Hysteria2 – Tokyo, Hysteria2 – Singapore, each pointing at that server's address. The client's URL-test group picks the fastest.
7. What is now true
- Traffic through any of the three servers counts once against the same quota.
- Three devices means three across all servers (up to three IPv4 addresses and three IPv6 /64s), not three per server and nine in total.
- Disabling the user on Frankfurt removes them from Tokyo and Singapore within seconds.
- Adding a fourth server later is steps 1–4 again; every existing line deployed to "all servers" appears on it, and every subscription grows a fourth node on the next refresh.
When a node shows offline
- Hover the status: connection timed out means port 2053 is closed on the node's firewall or security group; token mismatch means the token was copied wrong; certificate not trusted means "insecure" should be ticked for a self-signed node.
- Click Test on the row to retry immediately instead of waiting for the next tick.
- Nodes keep forwarding while offline from the master's point of view; nothing is lost, and traffic is reconciled from the node's cursor when it reconnects.